How to Make Yourself look like a Zombie in Photoshop
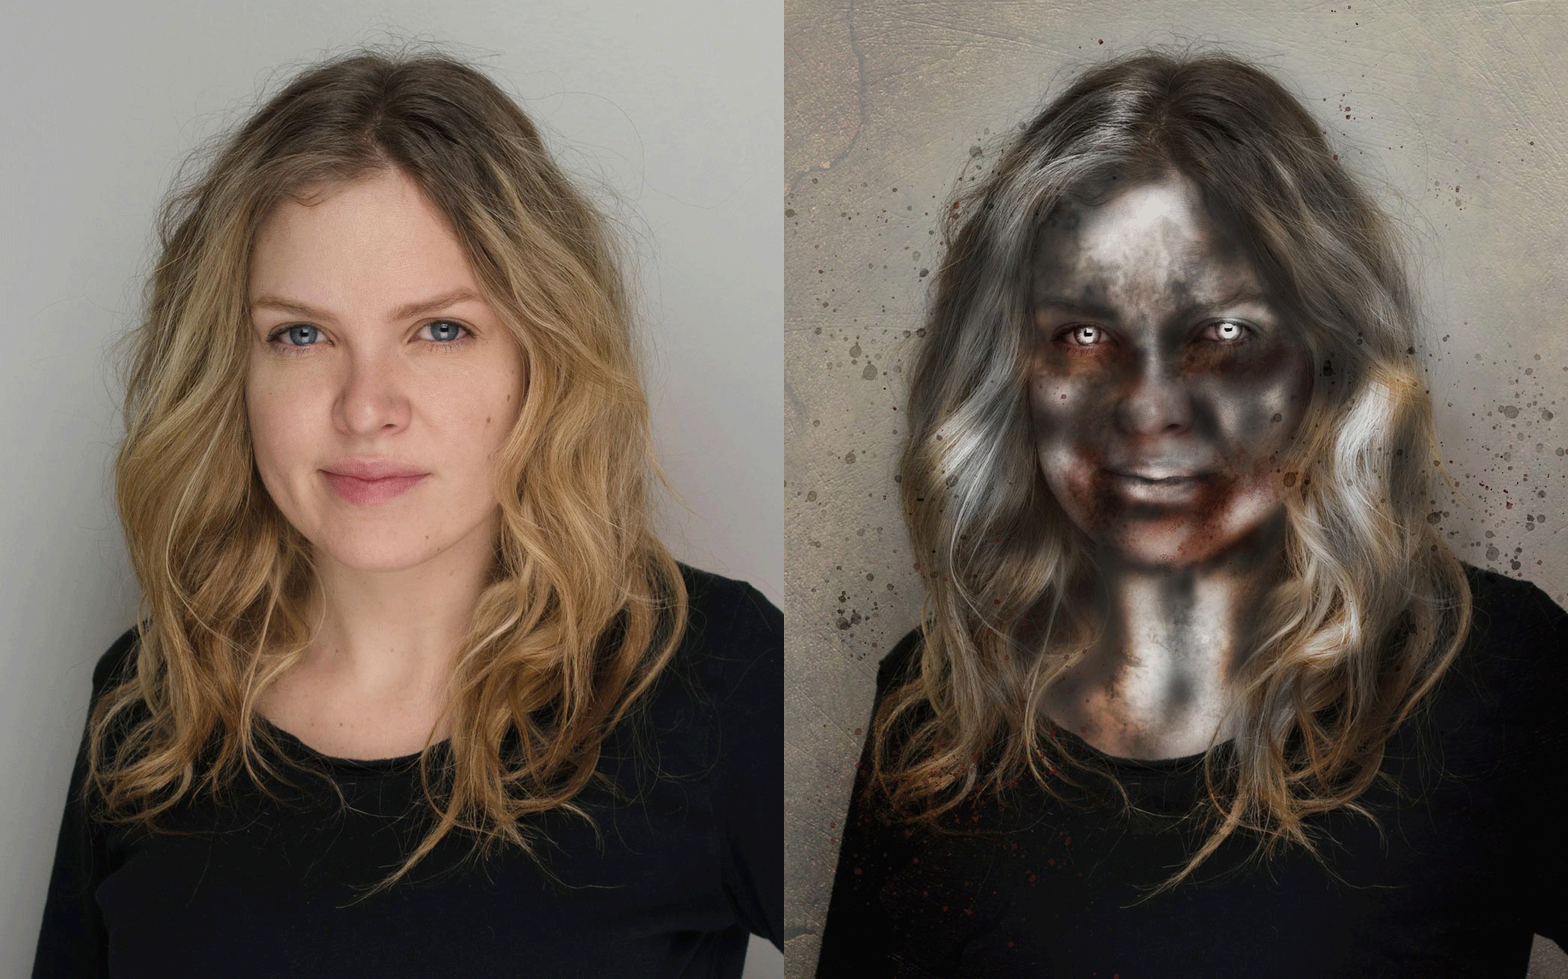
First you start with a lovely head shot, or any kind of portrait. For this I used an old head shot of myself. I then used the Dodge tool to overly lighten highlights on the skin, and on the eyes. Then I used the burn tool around the eyes, mouth, and hairline. Next, I used the sponge tool to take away some of the color. At this point the photo was still way too pink for a zombie. Looking dead is the key! I then added a texture layer of a photo I took of a granite countertop. You could easily do this yourself! I then chose to set the layer to “overlay”, and I masked off the parts I didn’t want it to cover. I then added a texture layer of a photo of dirt I took. I literally went outside and just took a picture of dirt. SO EASY! I chose to set the layer to soft light and masked off the parts I didn’t want to show through. I felt the image needed some grit. I think I got this next texture from Brooke Shaden. If you haven’t seen her artwork you need to go look now! Here! I then added some gore with a soft paintbrush around the eyes, nose and mouth, and I set the layer to soft light. Then added more gore with a brush, I think maybe I got online here. Then I just add more shadows and depth. There you have it! Years of art lessons have finally paid off! Ha! If you are interested in having me “zombify” one of your own photos please contact me! See my speed edit below.
Thanks for reading/watching!

