5 Basic Lighting Techniques

Understanding light is crucial to being able to take a good photograph. In this blog I am going to explain how to identify certain basic types of light and how to use them. Different types of light will flatter your subject or actually make them look terrible.  Please excuse my expression in most of these, I do not enjoy self portraits! Ha!

See below for my examples.

1.       Split Lighting:

This looks exactly how it sounds.  With your light source right beside and pointing at your subject you will have exactly half of their face in light and half in the shadow. Perfect split lighting puts the eye opposite of the light source completely in shadow.   However, if you wanted to do a slight variation you can turn your subjects face slightly towards the light. This is traditionally used for a more masculine look, so it suits men better than women. Of course, that does not mean rules cannot be broken.
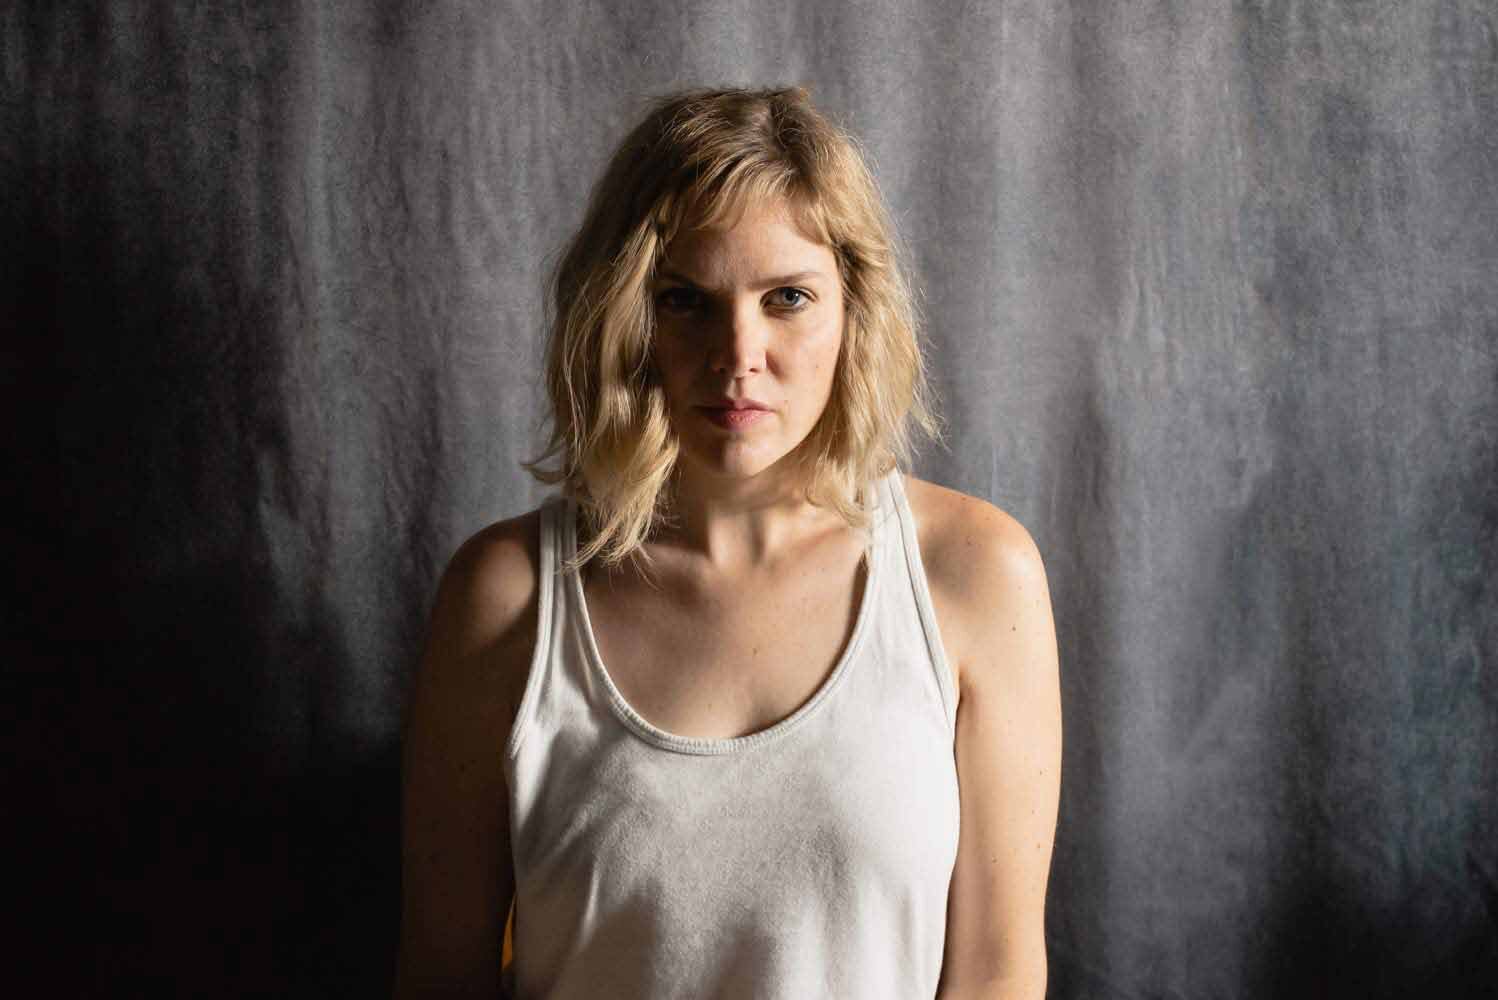
Split Lighting

Split Lighting

2.       Rembrandt Lighting:

This type of lighting is named after the Dutch painter who used this lighting often in his portrait paintings. This is generally very low key with lots of shadow.  You can identify Rembrandt lighting by the little triangle highlight on the cheek opposite of the light source (the shadow side of the face).  This type of lighting is iconic in his portraits. See here for an example.  This set up is very similar to split lighting, but you would turn your subjects face just slightly towards the light. The light source needs to be above them to look natural, as the sun typically lights people from above. Make sure that you get that little catchlight in both eyes.  This is usually used for a moody and dramatic portrait.

Rembrandt Lighting

Rembrandt Lighting

3.       Butterfly light:

This type of light creates shadows underneath your subjects’ nose and cheek bones.  This type of light is typically used for glamour portraits as it is very flattering to your subject.  In my example my light may have been too directly overhead.  It is not great for someone with deeper set eyes, like me in this picture. So be aware of that. But it can be adjusted to be a little softer by moving the light source back away from your subject and behind the camera. I wanted to make sure you could really see the butterfly shadow under the nose for my example.   

Butterfly Lighting

4.       Loop lighting:

You can identify loop lighting by the small shadow cast by the nose of your subject. It is very flattering to almost everyone and is a great go to for a lighting set up. The light source needs to be higher than your subject and more in front of your subject than Rembrandt lighting, but still off to the side slightly. The shadow cast by your subject’s nose should be very small and not intersect with the shadow from the cheek.

Loop Lighting

Loop Lighting

5.       Flat Lighting:

This type of lighting is usually discouraged in photography because it is not interesting.  It takes away all the depth of your subject, but it is still very useful.  Flat lighting fills in all the shadows and fine lines and wrinkles on your subject’s face. So, it is actually very flattering.  You can identify flat lighting by the lack of shadow under your subject’s nose.  To achieve this look your light source needs to be very soft and high, and you would put it directly over your subject.  Photographers often like this type of light because it is so flattering to their subjects.  This is why it is not a good idea to cancel if it is a cloudy day.  The sunlight is diffused by the clouds giving a nice and soft even light which is very flattering for everyone.

Flat Light

Flat Light

I hope you have found this helpful. Thanks for reading!

5 Ways to Isolate your Subject

We have all heard about how important it is compositionally to direct your viewers eye to your subject.  Well, how exactly do you do that in photography?  Here are some ideas on how to isolate your subject from the background therefore guiding your viewers’ attention exactly where it needs to be.

1.) Rim light

Rim light is my absolute favorite type of light.  This is where you have a thin line of light around your subject.  To achieve rim light, place your subject in directional light. It helps to have the background dark. This makes the rim light even more visible. Rim light will separate your subject from the background giving them an angelic look. Right now, here in Columbus, Indiana, a good time to get rim light is between 6:30-7:30PM.

Columbus-Indiana-photography-callihan-photo-rim-light.jpg

2.) Lightest Object in the Frame. 

Your eyes automatically gravitate to the lightest object in your photograph.  So, if you surround your subject with a dark background it will not only bring interest to your subject but separate them from the background.

Columbus-Indiana-Photographer-flower.jpg

3.) Framing with Negative Space

If you love a minimalist photo this is the way to go!  By using lots of negative space, it will bring your eye directly to your subject.  You can do this by getting low and using the sky.  Or you can use a large tree or building to create space around your subject.  So, it is perfect for urban or rural settings.  You can really use this type of composition anywhere.  

Columbus-Indiana-portrait-photographer-Callihan-Photography.jpg

4.) Shallow Depth of Field

This is my go-to idea!  I love to shoot using a wide-open aperture.  This will create a dreamy and soft background completely isolating your subject.  You can also achieve a shallower depth of field by using a longer lens and shortening the distance between you and your subject.  I love using my Sigma 135mm Art lens for this technique.  But any lens will do as long as you can open the aperture to 2.2 or below.

Indiana-photographer-cardinal.jpg

5.) Panning

Panning is an art in itself.  It takes some work to get used to.  This is where your background is very blurry and shows movement, but at least a small slice of your subject is sharp.  This is achieved by using a slower shutter speed and then moving the camera along with your moving subject.  I suggest lots of trial and error when adjusting your settings.  I prefer 1/20- 1/60 sec shutter speed. This, of course, depends on how fast your subject is moving. So, it may take some patience and effort to find that perfect shutter speed.  I also find it a little easier to use a longer lens if you can.  Though I end up using my 35mm often!


columbus-indiana-photographers-callihan-photography-panning.jpg

Try to apply these ideas to your photography! I’d love to see it! Thanks for reading.

Thoughts from Quarantine

Hi there! I thought I would take a slight detour from photography to discuss these crazy times we are living in. I hope you all are staying healthy. 

First, I wanted to express how grateful I am for those who work outside the home, putting others wellbeing over their own. We see you, and we are so thankful for you!  I hope you feel appreciated not only from your communities but also your families.  

Second, if you are feeling anxious or lonely or depressed know that you are not alone.  Be brave enough to reach out.  Get the help you need.  Get the prayer you need.  Get the encouragement you need.  This is indeed a strange time we are living in.  Be brave and bold, and I think that once you put it all into the light it will not have nearly the power you think it does.    

Third, I wanted to take the time to say to everyone “we need to just enjoy being still”.  Sometimes it is hard to be alone with your thoughts.  Sometimes it is hard to take a break from this busy life we all get caught up in.  I hope you are spending time just being still.  Take it in.  Let your thoughts and feelings sink in. Spend your time being productive, but also rest! Be grateful for the things and people you do have in your life. Take this time to really reflect on God, and your family and your own thoughts and feelings. I know it feels like we have been doing this quarantine thing a long time.  But believe it or not this will pass, and things WILL get back to normal.  I hope you are seeing the unexpected blessings of this time. 

I am still booking sessions for the future! I hope you are all thriving!  Please reach out to me if you need anything photography related, or if you need prayer, or encouragement.  Remember, this is only momentary.

callihan-photography-lets-all-be-well.jpg

Thanks for reading!